/tests/unit/coverage",
"collectCoverageFrom": [
"src/**/*.{js,vue}",
"!src/main.js",
"!src/router/index.js",
"!**/node_modules/**"
]
}
}
```
Jest needs to know the right output directory `/tests/unit/coverage` to show a correct output when `npm run test:unit` is run (or the corresponding Maven build). If you run the Jest Unit tests now with:
`npm run test:unit`
- you´ll recognize the table of test covered files:

##### Integration in Maven build (via frontend-maven-plugin)
Inside the [pom.xml](pom.xml) we always automatically run the Jest Unittests with the following configuration:
```xml
npm run test:unit
npm
test
run test:unit
```
This will integrate the Jest Unittests right after the npm run build command, just you are used to in Java-style projects:

And don't mind the depiction with `ERROR` - this is just a known bug: https://github.com/eirslett/frontend-maven-plugin/issues/584
##### Run Jest tests inside IntelliJ
First, we need to install the NodeJS IntelliJ plugin (https://www.jetbrains.com/help/idea/developing-node-js-applications.html), which isn't bundled with IntelliJ by default:

IntelliJ Jest integration docs: https://www.jetbrains.com/help/idea/running-unit-tests-on-jest.html
The automatic search inside the [package.json](frontend/package.json) for the Jest configuration file [jest.conf.js](frontend/test/unit/jest.conf.js) doesn't seem to work right now, so we have to manually configure the `scripts` part of:
```
"unit": "jest --config test/unit/jest.conf.js --coverage",
```
inside the Run Configuration under `Jest` and `All Tests`:

Now, when running `All Tests`, this should look like you're already used to Unittest IntelliJ-Integration:

## End-2-End (E2E) tests with Nightwatch
Great tooling: http://nightwatchjs.org/ - Nightwatch controls WebDriver / Selenium standalone Server in own child process and abstracts from those, providing a handy DSL for Acceptance tests:
Docs: http://nightwatchjs.org/gettingstarted/#browser-drivers-setup
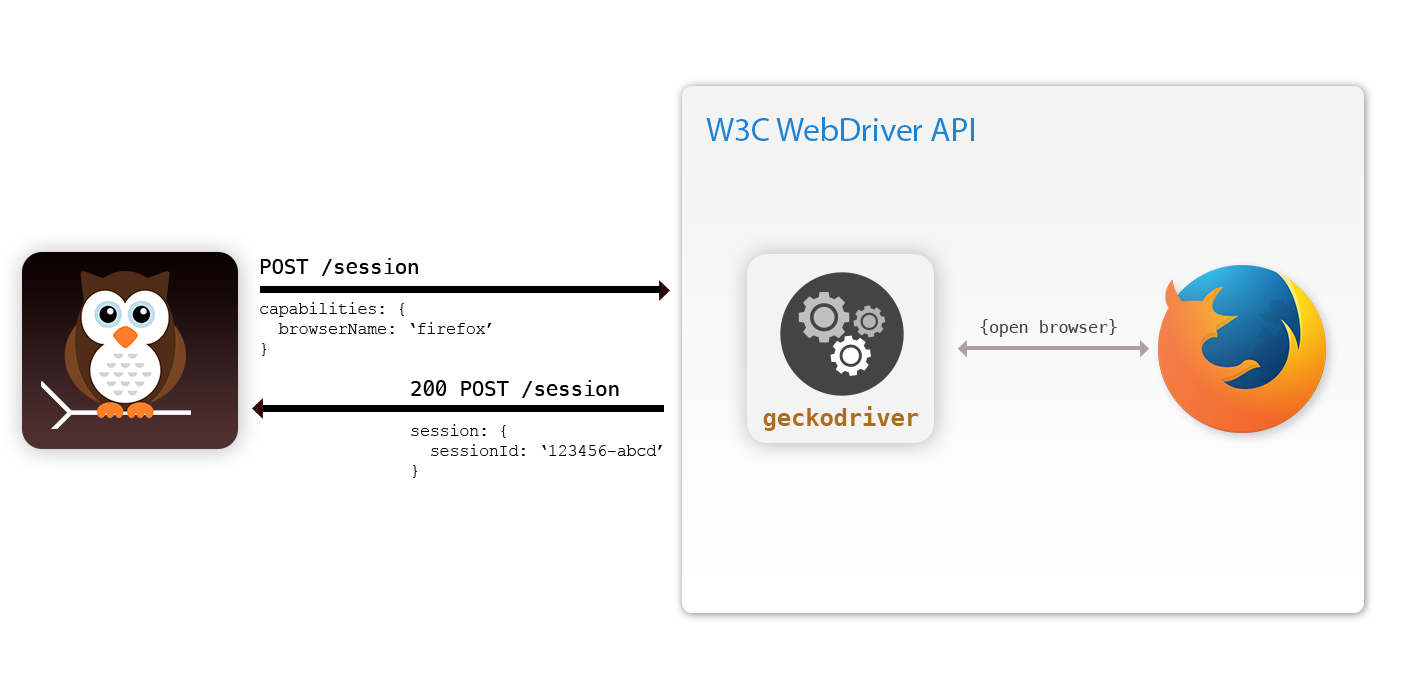
Nightwatch is configured through the [nightwatch.conf.js](/frontend/test/e2e/nightwatch.conf.js). Watch out for breaking changes in 1.x: https://github.com/nightwatchjs/nightwatch/wiki/Migrating-to-Nightwatch-1.0
More options could be found in the docs: http://nightwatchjs.org/gettingstarted/#settings-file
#### Write Nightwatch tests
An example Nightwatch test is provided in [HelloAcceptance.test.js](/frontend/test/e2e/specs/HelloAcceptance.test.js):
```js
module.exports = {
'default e2e tests': browser => {
browser
.url(process.env.VUE_DEV_SERVER_URL)
.waitForElementVisible('#app', 5000)
.assert.elementPresent('.hello')
.assert.containsText('h1', 'Welcome to your Vue.js powered Spring Boot App')
.assert.elementCount('img', 1)
.end()
}
}
```
##### Run E2E Tests
`npm run test:e2e`
## Run all tests
`npm test`
## NPM Security
npm Security - npm@6
https://medium.com/npm-inc/announcing-npm-6-5d0b1799a905
`npm audit`
https://blog.npmjs.org/post/173719309445/npm-audit-identify-and-fix-insecure
Run `npm audit fix` to update the vulnerable packages. Only in situations, where nothing else helps, try `npm audit fix --force` (this will also install braking changes)
https://nodejs.org/en/blog/vulnerability/june-2018-security-releases/
---> __Update NPM regularly__
https://docs.npmjs.com/troubleshooting/try-the-latest-stable-version-of-npm
`npm install -g npm@latest`
---> __Update Packages regularly__
https://docs.npmjs.com/getting-started/updating-local-packages
`npm outdated`
`npm update`
## Shift from templates to plugin-based architecture in Vue Cli 3
In the long run, templates like the main [webpack](https://github.com/vuejs-templates/webpack) are deprecated in the Vue.js universe:
https://vuejsdevelopers.com/2018/03/26/vue-cli-3/
Plugins bring the following benefits compared to templates:
* No lock in, as plugins can be added at any point in the development lifecycle
* Zero config plugins allow you to spend time developing rather than configuring
* Easy to upgrade, as configuration can be customized without “ejecting”
* Allows developers to make their own plugins and presets
Starting point: https://cli.vuejs.org/
#### OMG! My package.json is so small - Vue CLI 3 Plugins
From https://cli.vuejs.org/guide/plugins-and-presets.html:
> Vue CLI uses a plugin-based architecture. If you inspect a newly created project's package.json, you will find dependencies that start with `@vue/cli-plugin-`. Plugins can modify the internal webpack configuration and inject commands to `vue-cli-service`. Most of the features listed during the project creation process are implemented as plugins.
With plugings, extensions to an existing project could also be made via: `vue add pluginName`. E.g. if you want to add Nightwatch E2E tests to your project, just run `vue add @vue/e2e-nightwatch`. All scoped packages are available here: https://github.com/vuejs/vue-cli/tree/dev/packages/%40vue
These new Vue CLI 3 plugin architecture cleans our big `package.json` to a really neat compact thing. This was the old big dependency block:
````json
"devDependencies": {
"@vue/test-utils": "^1.0.0-beta.25",
"autoprefixer": "^7.1.2",
"babel-core": "^6.26.3",
"babel-helper-vue-jsx-merge-props": "^2.0.3",
"babel-jest": "^21.0.2",
"babel-loader": "^7.1.5",
"babel-plugin-dynamic-import-node": "^1.2.0",
"babel-plugin-syntax-jsx": "^6.18.0",
"babel-plugin-transform-es2015-modules-commonjs": "^6.26.0",
"babel-plugin-transform-runtime": "^6.22.0",
"babel-plugin-transform-vue-jsx": "^3.5.0",
"babel-preset-env": "^1.7.0",
"babel-preset-stage-2": "^6.22.0",
"babel-register": "^6.22.0",
"chalk": "^2.4.1",
"chromedriver": "^2.41.0",
"copy-webpack-plugin": "^4.5.2",
"cross-spawn": "^5.0.1",
"css-loader": "^0.28.0",
"extract-text-webpack-plugin": "^3.0.0",
"file-loader": "^1.1.4",
"friendly-errors-webpack-plugin": "^1.6.1",
"html-webpack-plugin": "^2.30.1",
"jest": "^22.0.4",
"jest-serializer-vue": "^0.3.0",
"nightwatch": "^1.0.11",
"node-notifier": "^5.1.2",
"optimize-css-assets-webpack-plugin": "^3.2.0",
"ora": "^1.2.0",
"portfinder": "^1.0.17",
"postcss-import": "^11.0.0",
"postcss-loader": "^2.1.6",
"postcss-url": "^7.2.1",
"rimraf": "^2.6.0",
"selenium-server": "^3.14.0",
"semver": "^5.5.1",
"shelljs": "^0.7.6",
"uglifyjs-webpack-plugin": "^1.3.0",
"url-loader": "^1.1.1",
"vue-jest": "^1.0.2",
"vue-loader": "^13.7.3",
"vue-style-loader": "^3.0.1",
"vue-template-compiler": "^2.5.17",
"webpack": "^3.6.0",
"webpack-bundle-analyzer": "^2.13.1",
"webpack-dev-server": "^2.11.3",
"webpack-merge": "^4.1.4"
},
````
As you can see, we´re not only maintaining our high-level libraries of choice like nightwatch, jest and so on. We´re also maintaining libraries that they use itself. Now this is over with Vue CLI 3. Let´s have a look at the super clean dependency block now:
```json
"devDependencies": {
"@vue/cli-plugin-babel": "^3.0.3",
"@vue/cli-plugin-e2e-nightwatch": "^3.0.3",
"@vue/cli-plugin-unit-jest": "^3.0.3",
"@vue/cli-service": "^3.0.3",
"@vue/test-utils": "^1.0.0-beta.20",
"babel-core": "7.0.0-bridge.0",
"babel-jest": "^23.0.1",
"node-sass": "^4.9.0",
"sass-loader": "^7.0.1",
"vue-template-compiler": "^2.5.17"
},
```
As you dig into the directories like `node_modules/@vue/cli-plugin-e2e-nightwatch`, you´ll find where the used libraries of nightwatch are configured - in the respective `package.json` there:
```json
"dependencies": {
"@vue/cli-shared-utils": "^3.0.2",
"chromedriver": "^2.40.0",
"deepmerge": "^2.1.1",
"execa": "^0.10.0",
"nightwatch": "^0.9.21",
"selenium-server": "^3.13.0"
},
```
This is really cool, I have to admit!
#### The vue.config.js file
Vue CLI 3 removes the need for explicit configuration files - and thus you wont find any `build` or `config` directories in your projects root any more. This now implements a "convention over configuration" approach, which makes it much easier to kick-start a Vue.js project, as it provides widly used defaults to webpack etc. It also eases the upgradeability of Vue.js projects - or even makes it possible.
__But__: How do we configure webpack etc. for CORS handling, the build directories and so on? This could be done with the optional [vue.config.js](https://cli.vuejs.org/config/#vue-config-js):
```javascript
module.exports = {
// proxy all webpack dev-server requests starting with /api
// to our Spring Boot backend (localhost:8088) using http-proxy-middleware
// see https://cli.vuejs.org/config/#devserver-proxy
devServer: {
proxy: {
'/api': {
target: 'http://localhost:8088',
ws: true,
changeOrigin: true
}
}
},
// Change build paths to make them Maven compatible
// see https://cli.vuejs.org/config/
outputDir: 'target/dist'
}
```
#### Updating Vue in an existing project
Update your local `@vue/cli` to the latest version:
```
npm install -g @vue/cli
```
Then update Vue.js and all your other JS dependencies with:
```
cd frontend
npm update
```
## Build and run with Docker
In the issue [jonashackt/spring-boot-vuejs/issues/25](https://github.com/jonashackt/spring-boot-vuejs/issues/25) the question on how to build and run our spring-boot-vuejs app with Docker.
As already stated in the issue there are multiple ways of doing this. One I want to outline here is a more in-depth variant, where you'll know exacltly what's going on behind the scenes.
First we'll make use of [Docker's multi-stage build feature](https://docs.docker.com/develop/develop-images/multistage-build/) - in __the first stage__ we'll build our Spring Boot Vue.js app using our established Maven build process. Let's have a look into our [Dockerfile](Dockerfile):
```dockerfile
# Docker multi-stage build
# 1. Building the App with Maven
FROM maven:3-jdk-11
ADD . /springbootvuejs
WORKDIR /springbootvuejs
# Just echo so we can see, if everything is there :)
RUN ls -l
# Run Maven build
RUN mvn clean install
```
A crucial part here is to add all necessary files into our Docker build context - but leaving out the underlying OS specific node libraries! As not leaving them out would lead [to errors like](https://stackoverflow.com/questions/37986800/node-sass-could-not-find-a-binding-for-your-current-environment?page=1&tab=active#tab-top):
```
Node Sass could not find a binding for your current environment: Linux 64-bit with Node.js 11.x
```
Therefore we create a [.dockerignore](.dockerignore) file and leave out the directories `frontend/node_modules` & `frontend/node` completely using the `frontend/node*` configuration:
```
# exclude underlying OS specific node modules
frontend/node*
# also leave out pre-build output folders
frontend/target
backend/target
```
We also ignore the pre-build output directories.
In __the second stage__ of our [Dockerfile](Dockerfile) we use the build output of the first stage and prepare everything to run our Spring Boot powered Vue.js app later:
```dockerfile
# Just using the build artifact and then removing the build-container
FROM openjdk:11-jdk
MAINTAINER Jonas Hecht
VOLUME /tmp
# Add Spring Boot app.jar to Container
COPY --from=0 "/springbootvuejs/backend/target/backend-0.0.1-SNAPSHOT.jar" app.jar
ENV JAVA_OPTS=""
# Fire up our Spring Boot app by default
ENTRYPOINT [ "sh", "-c", "java $JAVA_OPTS -Djava.security.egd=file:/dev/./urandom -jar /app.jar" ]
```
Now we should everything prepared to run our Docker build:
```
docker build . --tag spring-boot-vuejs:latest
```
This build can take a while, since all Maven and NPM dependencies need to be downloaded for the build.
When the build is finished, simply start a Docker container based on the newly build image and prepare the correct port to be bound to the Docker host for easier access later:
```
docker run -d -p 8088:8088 --name myspringvuejs spring-boot-vuejs
```
Have a look into your running Docker containers with `docker ps` and you should see the new container:
```
$ docker ps
CONTAINER ID IMAGE COMMAND CREATED STATUS PORTS NAMES
745e854d7781 spring-boot-vuejs "sh -c 'java $JAVA_O…" 12 seconds ago Up 11 seconds 0.0.0.0:8088->8088/tcp myspringvuejs
```
If you want to see the typical Spring Boot startup logs, just use `docker logs 745e854d7781 --follow`:
```
$ docker logs 745e854d7781 --follow
. ____ _ __ _ _
/\\ / ___'_ __ _ _(_)_ __ __ _ \ \ \ \
( ( )\___ | '_ | '_| | '_ \/ _` | \ \ \ \
\\/ ___)| |_)| | | | | || (_| | ) ) ) )
' |____| .__|_| |_|_| |_\__, | / / / /
=========|_|==============|___/=/_/_/_/
:: Spring Boot :: (v2.1.2.RELEASE)
2019-01-29 09:42:07.621 INFO 8 --- [ main] d.j.s.SpringBootVuejsApplication : Starting SpringBootVuejsApplication v0.0.1-SNAPSHOT on 745e854d7781 with PID 8 (/app.jar started by root in /)
2019-01-29 09:42:07.627 INFO 8 --- [ main] d.j.s.SpringBootVuejsApplication : No active profile set, falling back to default profiles: default
2019-01-29 09:42:09.001 INFO 8 --- [ main] .s.d.r.c.RepositoryConfigurationDelegate : Bootstrapping Spring Data repositories in DEFAULT mode.
2019-01-29 09:42:09.103 INFO 8 --- [ main] .s.d.r.c.RepositoryConfigurationDelegate : Finished Spring Data repository scanning in 90ms. Found 1 repository interfaces.
2019-01-29 09:42:09.899 INFO 8 --- [ main] trationDelegate$BeanPostProcessorChecker : Bean 'org.springframework.transaction.annotation.ProxyTransactionManagementConfiguration' of type [org.springframework.transaction.annotation.ProxyTransactionManagementConfiguration$$EnhancerBySpringCGLIB$$bb072d94] is not eligible for getting processed by all BeanPostProcessors (for example: not eligible for auto-proxying)
2019-01-29 09:42:10.715 INFO 8 --- [ main] o.s.b.w.embedded.tomcat.TomcatWebServer : Tomcat initialized with port(s): 8088 (http)
2019-01-29 09:42:10.765 INFO 8 --- [ main] o.apache.catalina.core.StandardService : Starting service [Tomcat]
2019-01-29 09:42:10.765 INFO 8 --- [ main] org.apache.catalina.core.StandardEngine : Starting Servlet engine: [Apache Tomcat/9.0.14]
2019-01-29 09:42:10.783 INFO 8 --- [ main] o.a.catalina.core.AprLifecycleListener : The APR based Apache Tomcat Native library which allows optimal performance in production environments was not found on the java.library.path: [/usr/java/packages/lib:/usr/lib/x86_64-linux-gnu/jni:/lib/x86_64-linux-gnu:/usr/lib/x86_64-linux-gnu:/usr/lib/jni:/lib:/usr/lib]
2019-01-29 09:42:10.920 INFO 8 --- [ main] o.a.c.c.C.[Tomcat].[localhost].[/] : Initializing Spring embedded WebApplicationContext
2019-01-29 09:42:10.921 INFO 8 --- [ main] o.s.web.context.ContextLoader : Root WebApplicationContext: initialization completed in 3209 ms
2019-01-29 09:42:11.822 INFO 8 --- [ main] com.zaxxer.hikari.HikariDataSource : HikariPool-1 - Starting...
2019-01-29 09:42:12.177 INFO 8 --- [ main] com.zaxxer.hikari.HikariDataSource : HikariPool-1 - Start completed.
2019-01-29 09:42:12.350 INFO 8 --- [ main] o.hibernate.jpa.internal.util.LogHelper : HHH000204: Processing PersistenceUnitInfo [
name: default
...]
2019-01-29 09:42:12.520 INFO 8 --- [ main] org.hibernate.Version : HHH000412: Hibernate Core {5.3.7.Final}
2019-01-29 09:42:12.522 INFO 8 --- [ main] org.hibernate.cfg.Environment : HHH000206: hibernate.properties not found
2019-01-29 09:42:12.984 INFO 8 --- [ main] o.hibernate.annotations.common.Version : HCANN000001: Hibernate Commons Annotations {5.0.4.Final}
2019-01-29 09:42:13.894 INFO 8 --- [ main] org.hibernate.dialect.Dialect : HHH000400: Using dialect: org.hibernate.dialect.H2Dialect
2019-01-29 09:42:15.644 INFO 8 --- [ main] o.h.t.schema.internal.SchemaCreatorImpl : HHH000476: Executing import script 'org.hibernate.tool.schema.internal.exec.ScriptSourceInputNonExistentImpl@64524dd'
2019-01-29 09:42:15.649 INFO 8 --- [ main] j.LocalContainerEntityManagerFactoryBean : Initialized JPA EntityManagerFactory for persistence unit 'default'
2019-01-29 09:42:16.810 INFO 8 --- [ main] o.s.s.concurrent.ThreadPoolTaskExecutor : Initializing ExecutorService 'applicationTaskExecutor'
2019-01-29 09:42:16.903 WARN 8 --- [ main] aWebConfiguration$JpaWebMvcConfiguration : spring.jpa.open-in-view is enabled by default. Therefore, database queries may be performed during view rendering. Explicitly configure spring.jpa.open-in-view to disable this warning
2019-01-29 09:42:17.116 INFO 8 --- [ main] o.s.b.a.w.s.WelcomePageHandlerMapping : Adding welcome page: class path resource [public/index.html]
2019-01-29 09:42:17.604 INFO 8 --- [ main] o.s.b.a.e.web.EndpointLinksResolver : Exposing 2 endpoint(s) beneath base path '/actuator'
2019-01-29 09:42:17.740 INFO 8 --- [ main] o.s.b.w.embedded.tomcat.TomcatWebServer : Tomcat started on port(s): 8088 (http) with context path ''
2019-01-29 09:42:17.745 INFO 8 --- [ main] d.j.s.SpringBootVuejsApplication : Started SpringBootVuejsApplication in 10.823 seconds (JVM running for 11.485)
```
Now access your Dockerized Spring Boot powererd Vue.js app inside your Browser at [http://localhost:8088](http://localhost:8088).
If you have played enough with your Dockerized app, don't forget to stop (`docker stop 745e854d7781`) and remove (`docker rm 745e854d7781`) it in the end.
#### Autorelease to Docker Hub on hub.docker.com
We also want to have the current version of our code build and released to https://hub.docker.com/. Therefore head to the repositories tab in Docker Hub and click `Create Repository`:

As the docs state, there are some config options to [setup automated builds](https://docs.docker.com/docker-hub/builds/).
Finally, we should see our Docker images released on https://hub.docker.com/r/jonashackt/spring-boot-vuejs and could run this app simply by executing:
```
docker run -p 8098:8098 jonashackt/spring-boot-vuejs:latest
```
This pulls the latest `jonashackt/spring-boot-vuejs` image and runs our app locally:
```
docker run -p 8098:8098 jonashackt/spring-boot-vuejs:latest
Unable to find image 'jonashackt/spring-boot-vuejs:latest' locally
latest: Pulling from jonashackt/spring-boot-vuejs
9a0b0ce99936: Pull complete
db3b6004c61a: Pull complete
f8f075920295: Pull complete
6ef14aff1139: Pull complete
962785d3b7f9: Pull complete
e275e7110d81: Pull complete
0ce121b6a2ff: Pull complete
71607a6adeb3: Pull complete
Digest: sha256:4037576ba5f6c58ed067eeef3ab2870a9de8dd1966a5906cb3d36d0ad98fa541
Status: Downloaded newer image for jonashackt/spring-boot-vuejs:latest
. ____ _ __ _ _
/\\ / ___'_ __ _ _(_)_ __ __ _ \ \ \ \
( ( )\___ | '_ | '_| | '_ \/ _` | \ \ \ \
\\/ ___)| |_)| | | | | || (_| | ) ) ) )
' |____| .__|_| |_|_| |_\__, | / / / /
=========|_|==============|___/=/_/_/_/
:: Spring Boot :: (v2.2.0.RELEASE)
2019-11-02 16:15:37.967 INFO 7 --- [ main] d.j.s.SpringBootVuejsApplication : Starting SpringBootVuejsApplication v0.0.1-SNAPSHOT on aa490bc6ddf4 with PID 7 (/app.jar started by root in /)
2019-11-02 16:15:37.973 INFO 7 --- [ main] d.j.s.SpringBootVuejsApplication : No active profile set, falling back to default profiles: default
2019-11-02 16:15:39.166 INFO 7 --- [ main] .s.d.r.c.RepositoryConfigurationDelegate : Bootstrapping Spring Data repositories in DEFAULT mode.
2019-11-02 16:15:39.285 INFO 7 --- [ main] .s.d.r.c.RepositoryConfigurationDelegate : Finished Spring Data repository scanning in 99ms. Found 1 repository interfaces.
2019-11-02 16:15:39.932 INFO 7 --- [ main] trationDelegate$BeanPostProcessorChecker : Bean 'org.springframework.transaction.annotation.ProxyTransactionManagementConfiguration' of type [org.springframework.transaction.annotation.ProxyTransactionManagementConfiguration] is not eligible for getting processed by all BeanPostProcessors (for example: not eligible for auto-proxying)
2019-11-02 16:15:40.400 INFO 7 --- [ main] o.s.b.w.embedded.tomcat.TomcatWebServer : Tomcat initialized with port(s): 8098 (http)
2019-11-02 16:15:40.418 INFO 7 --- [ main] o.apache.catalina.core.StandardService : Starting service [Tomcat]
...
2019-11-02 16:15:54.048 INFO 7 --- [nio-8098-exec-1] o.s.web.servlet.DispatcherServlet : Initializing Servlet 'dispatcherServlet'
2019-11-02 16:15:54.081 INFO 7 --- [nio-8098-exec-1] o.s.web.servlet.DispatcherServlet : Completed initialization in 32 ms
```
Now head over to [http://localhost:8098/](http://localhost:8098/) and see the app live :)
# Run with JDK 8, 9 or 11 ff
As with Spring Boot, we can define the desired Java version simply by editing our backend's [pom.xml](backend/pom.xml):
```
1.8
```
If you want to have `JDK9`, place a `9` or other versions just as you like to (see [this stackoverflow answer](https://stackoverflow.com/questions/54467287/how-to-specify-java-11-version-in-spring-spring-boot-pom-xml)).
Spring Boot handles the needed `maven.compiler.release`, which tell's Java from version 9 on to build for a specific target.
We just set `1.8` as the baseline here, since if we set a newer version as the standard, builds on older versions then 8 will fail (see [this build log for example](https://travis-ci.org/jonashackt/spring-boot-vuejs/builds/547227298).
Additionally, we use TravisCI to run the Maven build on some mayor Java versions - have a look into the [.travis.yml](.travis.yml):
```
language: java
jdk:
- oraclejdk8
- oraclejdk9
- oraclejdk11
```
# Secure Spring Boot backend and protect Vue.js frontend
Securing parts of our application must consist of two parts: securing the Spring Boot backend - and reacting on that secured backend in the Vue.js frontend.
https://spring.io/guides/tutorials/spring-security-and-angular-js/
https://developer.okta.com/blog/2018/11/20/build-crud-spring-and-vue
https://auth0.com/blog/vuejs2-authentication-tutorial/
https://medium.com/@zitko/structuring-a-vue-project-authentication-87032e5bfe16
## Secure the backend API with Spring Security
https://spring.io/guides/tutorials/spring-boot-oauth2
https://spring.io/guides/gs/securing-web/
https://www.baeldung.com/rest-assured-authentication
Now let's focus on securing our Spring Boot backend first! Therefore we introduce a new RESTful resource, that we want to secure specifically:
+---+ +---+ +---+
| | /api/hello | | /api/user | | /api/secured
+---+ +---+ +---+
| | |
+-----------------------------------------------------------------------+
| |
| |
| |
| |
| |
| Spring Boot backend |
| |
+-----------------------------------------------------------------------+
#### Configure Spring Security
First we add a new REST resource `/secured` inside our `BackendController we want to secure - and use in a separate frontend later:
```
@GetMapping(path="/secured")
public @ResponseBody String getSecured() {
LOG.info("GET successfully called on /secured resource");
return SECURED_TEXT;
}
```
With Spring it is relatively easy to secure our API. Let's add `spring-boot-starter-security` to our [pom.xml](backend/pom.xml):
```xml
org.springframework.boot
spring-boot-starter-security
org.springframework.security
spring-security-test
test
```
Also create a new @Configuration annotated class called [WebSecurityConfiguration.class](backend/src/main/java/de/jonashackt/springbootvuejs/configuration/WebSecurityConfiguration.java):
```java
package de.jonashackt.springbootvuejs.configuration;
import org.springframework.context.annotation.Configuration;
import org.springframework.security.config.annotation.authentication.builders.AuthenticationManagerBuilder;
import org.springframework.security.config.annotation.web.builders.HttpSecurity;
import org.springframework.security.config.annotation.web.configuration.EnableWebSecurity;
import org.springframework.security.config.annotation.web.configuration.WebSecurityConfigurerAdapter;
import org.springframework.security.config.http.SessionCreationPolicy;
@Configuration
@EnableWebSecurity
public class WebSecurityConfiguration extends WebSecurityConfigurerAdapter {
@Override
protected void configure(HttpSecurity http) throws Exception {
http
.sessionManagement().sessionCreationPolicy(SessionCreationPolicy.STATELESS) // No session will be created or used by spring security
.and()
.httpBasic()
.and()
.authorizeRequests()
.antMatchers("/api/hello").permitAll()
.antMatchers("/api/user/**").permitAll() // allow every URI, that begins with '/api/user/'
.antMatchers("/api/secured").authenticated()
.anyRequest().authenticated() // protect all other requests
.and()
.csrf().disable(); // disable cross site request forgery, as we don't use cookies - otherwise ALL PUT, POST, DELETE will get HTTP 403!
}
@Override
protected void configure(AuthenticationManagerBuilder auth) throws Exception {
auth.inMemoryAuthentication()
.withUser("foo").password("{noop}bar").roles("USER");
}
}
```
Using a simple `http.httpBasic()` we configure to provide a Basic Authentication for our secured resources.
To deep dive into the Matcher configurations, have a look into https://docs.spring.io/spring-security/site/docs/current/reference/htmlsingle/#jc-authorize-requests
#### Be aware of CSRF!
__BUT:__ Be aware of the CSRF (cross site request forgery) part! The defaults will render a [HTTP 403 FORBIDDEN for any HTTP verb that modifies state (PATCH, POST, PUT, DELETE)](https://docs.spring.io/spring-security/site/docs/current/reference/htmlsingle/#csrf-configure):
> by default Spring Security’s CSRF protection will produce an HTTP 403 access denied.
For now we can disable the default behavior with `http.csrf().disable()`
#### Testing the secured Backend
See https://www.baeldung.com/rest-assured-authentication
Inside our [BackendControllerTest](backend/src/test/java/de/jonashackt/springbootvuejs/controller/BackendControllerTest.java) we should check, whether our API reacts with correct HTTP 401 UNAUTHORIZED, when called without our User credentials:
```
@Test
public void secured_api_should_react_with_unauthorized_per_default() {
given()
.when()
.get("/api/secured")
.then()
.statusCode(HttpStatus.SC_UNAUTHORIZED);
}
```
Using `rest-assured` we can also test, if one could access the API correctly with the credentials included:
```
@Test
public void secured_api_should_give_http_200_when_authorized() {
given()
.auth().basic("foo", "bar")
.when()
.get("/api/secured")
.then()
.statusCode(HttpStatus.SC_OK)
.assertThat()
.body(is(equalTo(BackendController.SECURED_TEXT)));
}
```
The crucial point here is to use the `given().auth().basic("foo", "bar")` configuration to inject the correct credentials properly.
#### Configure credentials inside application.properties and environment variables
Defining the users (and passwords) inside code (like our [WebSecurityConfiguration.class](backend/src/main/java/de/jonashackt/springbootvuejs/configuration/WebSecurityConfiguration.java)) that should be given access to our application is a test-only practice!
For our super simple example application, we could have a solution quite similar - but much more safe: If we would be able to extract this code into configuration and later use Spring's powerful mechanism of overriding these configuration with environment variables, we could then store them safely inside our deployment pipelines settings, that are again secured by another login - e.g. as Heroku Config Vars.
Therefore the first step would be to delete the following code:
```
@Override
protected void configure(AuthenticationManagerBuilder auth) throws Exception {
auth.inMemoryAuthentication()
.withUser("foo").password("{noop}bar").roles("USER");
}
```
and add the following configuration to our [application.properties](backend/src/main/resources/application.properties):
```
spring.security.user.name=sina
spring.security.user.password=miller
```
Running our tests using the old credentials should fail now. Providing the newer one, the test should go green again.
Now introducing environment variables to the game could also be done locally inside our IDE for example. First change the test `secured_api_should_give_http_200_when_authorized` again and choose some new credentials like user `maik` with pw `meyer`.
Don't change the `application.properties` right now - use your IDE's run configuration and insert two environment variables:
```
SPRING_SECURITY_USER_NAME=maik
SPRING_SECURITY_USER_PASSWORD=meyer
```
Now the test should run green again with this new values.
## Protect parts of Vue.js frontend
Now that we have secured a specific part of our backend API, let's also secure a part of our Vue.js frontend:
+-----------------------------------------------------------------------+
| Vue.js frontend |
| |
| +-----------------+ +-----------------+ +-----------------+ |
| | | | | | | |
| | | | | | Protected | |
| | | | | | | |
| | | | | | Vue.js View | |
| | | | | | | |
| +-----------------+ +-----------------+ +-----------------+ |
| |
+-----------------------------------------------------------------------+
+---+ +---+ +---+
| | /api/hello | | /api/user | | /api/secured
+---+ +---+ +---+
| | |
+-----------------------------------------------------------------------+
| |
| |
| |
| |
| |
| |
| Spring Boot backend |
+-----------------------------------------------------------------------+
#### Create a new Vue Login component
As there is already a secured Backend API, we also want to have a secured frontend part.
Every solution you find on the net seems to be quite overengineered for the "super-small-we-have-to-ship-today-app". Why should we bother with a frontend auth store like vuex at the beginning? Why start with OAuth right up front? These could be easily added later on!
The simplest solution one could think about how to secure our frontend, would be to create a simple Login.vue component, that simply accesses the `/api/secured` resource every time the login is used.
Therefore we use [Vue.js conditionals](https://vuejs.org/v2/guide/conditional.html) to show something on our new [Login.vue](frontend/src/components/Login.vue):
```
Access to protected site granted!
If you're able to read this, you've successfully logged in.
You don't have rights here, mate :D
Seams that you don't have access rights...
Please login to get access!
You're not logged in - so you don't see much here. Try to log in:
```
For now the conditional is only handled by two boolean values: `loginSuccess` and `loginError`.
To bring those to life, we implement the `callLogin()` method:
```
,
methods: {
callLogin() {
api.getSecured(this.user, this.password).then(response => {
console.log("Response: '" + response.data + "' with Statuscode " + response.status)
if(response.status == 200) {
this.loginSuccess = true
}
}).catch(error => {
console.log("Error: " + error)
this.loginError = true
})
}
}
```
With this simple implementation, the Login component asks the Spring Boot backend, if a user is allowed to access the `/api/secured` resource. The [backend-api.js](frontend/src/components/backend-api.js) provides an method, which uses axios' Basic Auth feature:
```
getSecured(user, password) {
return AXIOS.get(`/secured/`,{
auth: {
username: user,
password: password
}});
}
```
Now the Login component works for the first time:

#### Protect multiple Vue.js components
Now we have a working Login component. Now let's create a new `Protected.vue` component, since we want to have something that's only accessible, if somebody has logged in correctly:
```
Access to protected site granted!
If you're able to read this, you've successfully logged in.
Please login to get access!
You're not logged in - so you don't see much here. Try to log in:
Login
```
This component should only be visible, if the appropriate access was granted at the Login. Therefore we need to solve 2 problems:
* __Store the login state__
* __Redirect user from Protected.vue to Login.vue, if not authenticated before__
#### Store login information with vuex
The super dooper simple solution would be to simply use `LocalStorage`. But with [vuex](https://github.com/vuejs/vuex) there is a centralized state management in Vue.js, which is pretty popular. So we should invest some time to get familiar with it. There's a full guide available: https://vuex.vuejs.org/guide/ and a great introductory blog post here: https://pusher.com/tutorials/authentication-vue-vuex
You could also initialize a new Vue.js project with Vue CLI and mark the `vuex` checkbox. But we try to extend the current project here.
First we add [the vuex dependency](https://www.npmjs.com/package/vuex) into our [package.json](frontend/package.json):
```
...
"vue": "^2.6.10",
"vue-router": "^3.0.6",
"vuex": "^3.1.1"
},
```
> There are four things that go into a Vuex module: the initial [state](https://vuex.vuejs.org/guide/state.html), [getters](https://vuex.vuejs.org/guide/getters.html), [mutations](https://vuex.vuejs.org/guide/mutations.html) and [actions](https://vuex.vuejs.org/guide/actions.html)
#### Define the vuex state
To implement them, we create a new [store.js](frontend/src/store.js) file:
```
import Vue from 'vue'
import Vuex from 'vuex'
Vue.use(Vuex)
export default new Vuex.Store({
state: {
loginSuccess: false,
loginError: false,
userName: null
},
mutations: {
},
actions: {
},
getters: {
}
})
```
We only have an initial state here, which is that a login could be successful or not - and there should be a `userName`.
#### Define a vuex action login() and the mutations login_success & login_error
Then we have a look onto __vuex actions: They provide a way to commit mutations to the vuex store.__
As our app here is super simple, we only have one action to implement here: `login`. We omit the `logout` and `register` actions, because we only define one admin user in the Spring Boot backend right now and don't need an implemented logout right now. Both could be implemented later!
We just shift our logic on how to login a user from the `Login.vue` to our vuex action method:
```
mutations: {
login_success(state, name){
state.loginSuccess = true
state.userName = name
},
login_error(state){
state.loginError = true
state.userName = name
}
},
actions: {
async login({commit}, user, password) {
api.getSecured(user, password)
.then(response => {
console.log("Response: '" + response.data + "' with Statuscode " + response.status);
if(response.status == 200) {
// place the loginSuccess state into our vuex store
return commit('login_success', name);
}
}).catch(error => {
console.log("Error: " + error);
// place the loginError state into our vuex store
commit('login_error', name);
return Promise.reject("Invald credentials!")
})
}
},
```
Instead of directly setting a boolean to a variable, we `commit` a mutation to our store if the authentication request was successful or unsuccessful. We therefore implement two simple mutations: `login_success` & `login_error`
#### Last but not least: define getters for the vuex state
To be able to access vuex state from within other components, we need to implement getters inside our vuex store. As we only want some simple info, we need the following getters:
```
getters: {
isLoggedIn: state => state.loginSuccess,
hasLoginErrored: state => state.loginError
}
```
#### Use vuex Store inside the Login component and forward to Protected.vue, if Login succeeded
Instead of directly calling the auth endpoint via axios inside our Login component, we now want to use our vuex store and its actions instead. Therefore we don't even need to import the [store.js](frontend/src/store.js) inside our `Login.vue`, we can simply access it through `$store`. Thy is that? Because we already did that inside our [main.js](frontend/src/main.js):
```
import store from './store'
...
new Vue({
router,
store,
render: h => h(App)
}).$mount('#app')
```
With that configuration `store` and `router` are accessible from within every Vue component with the `$` prefixed :)
If we have a look into our `Login.vue` we see that in action:
```
callLogin() {
this.$store.dispatch('login', { user: this.user, password: this.password})
.then(() => this.$router.push('/Protected'))
.catch(error => {
this.error.push(error)
})
}
```
Here we access our vuex store action `login` and issue a login request to our Spring Boot backend. If this succeeds, we use the Vue `$router` to forward the user to our `Protected.vue` component.
#### Redirect user from Protected.vue to Login.vue, if not authenticated before
Now let's enhance our [router.js](frontend/src/router.js) slightly. We use the Vue.js routers' [meta field](https://router.vuejs.org/guide/advanced/meta.html) feature to check, whether a user is loggin in already and therefore should be able to access our Protected component with the URI `/protected` :
```
{
path: '/protected',
component: Protected,
meta: {
requiresAuth: true
}
},
```
We also add a new behavior to our router, that checks if it requires authentication every time a route is accessed. If so, it will redirect to our Login component:
```
router.beforeEach((to, from, next) => {
if (to.matched.some(record => record.meta.requiresAuth)) {
// this route requires auth, check if logged in
// if not, redirect to login page.
if (!store.getters.isLoggedIn) {
next({
path: '/login'
})
} else {
next();
}
} else {
next(); // make sure to always call next()!
}
});
```
Now if one clicks onto `Protected` and didn't login prior, our application redirects to `Login` automatically:

With this redirect, we also don't need the part with `` inside our Login.vue, since in case of a successful login, the user is directly redirected to the Protected.vue.
## Check auth state at secured backend endpoints
We're now already where we wanted to be at the first place: Our Spring Boot backend has a secured API endpoint, which works with simple user/password authentication. And our Vue.js frontend uses this endpoint to do a Login and protect the `Protected` component, if the user didn't log in before. The login state is held in the frontend, using the `vuex` store.
Now if we want to go a step ahead and call a secured API endpoint in the backend from within our `Protected` frontend component, we need to fully store the credentials inside our `vuex` store, so we could access our secured resource
+-----------------------------------------------------------------------+
| Vue.js frontend |
| +----------------------------------------+ |
| | vuex store | |
| +----------------------------------------+ |
| | | |
| +-----------------+ +-----------------+ +-----------------+ |
| | | | | | | |
| | | | Login.vue | | Protected | |
| | | | | | | |
| +-----------------+ +-----------------+ +-----------------+ |
| | | |
+-------------------------------------------|---------------|-----------+
|-------------| |
+---+ +---+ +---+
| | /api/hello | | /api/user | | /api/secured
+---+ +---+ +---+
| | |
+-----------------------------------------------------------------------+
| |
| |
| |
| |
| |
| |
| Spring Boot backend |
+-----------------------------------------------------------------------+
Therefore we enhance our [store.js](frontend/src/store.js):
```
export default new Vuex.Store({
state: {
loginSuccess: false,
loginError: false,
userName: null,
userPass: null,
response: []
},
mutations: {
login_success(state, payload){
state.loginSuccess = true;
state.userName = payload.userName;
state.userPass = payload.userPass;
},
...
},
actions: {
login({commit}, {user, password}) {
...
// place the loginSuccess state into our vuex store
commit('login_success', {
userName: user,
userPass: password
});
...
getters: {
isLoggedIn: state => state.loginSuccess,
hasLoginErrored: state => state.loginError,
getUserName: state => state.userName,
getUserPass: state => state.userPass
}
```
> Be sure to use the current way to define and [interact with vuex mutations](https://vuex.vuejs.org/guide/mutations.html). Lot's of blog posts are using an old way of committing multiple parameters like `commit('auth_success', token, user)`. This DOES NOT work anymore. Only the first parameter will be set, the others are lost!
Now inside our [Protected.vue](frontend/src/components/Protected.vue), we can use the stored credentials to access our `/secured` endpoint:
```