# fed-e-vue-3-3
**Repository Path**: dadami/fed-e-vue-3-3
## Basic Information
- **Project Name**: fed-e-vue-3-3
- **Description**: vuex
- **Primary Language**: Unknown
- **License**: Not specified
- **Default Branch**: master
- **Homepage**: None
- **GVP Project**: No
## Statistics
- **Stars**: 1
- **Forks**: 0
- **Created**: 2020-08-01
- **Last Updated**: 2023-01-14
## Categories & Tags
**Categories**: Uncategorized
**Tags**: None
## README
# vuex-demo
## 启动node服务
```
node server.js
```
## Project setup
```
yarn install
```
### Compiles and hot-reloads for development
```
yarn serve
```
### Compiles and minifies for production
```
yarn build
```
### Lints and fixes files
```
yarn lint
```
### Customize configuration
See [Configuration Reference](https://cli.vuejs.org/config/).
### 课程目标
- Vue组件间同学方式回顾
- Vuex核心概念和基本使用回顾
- 购物车案例
- 模拟实现vuex
### 1.组件内的状态管理流程
Vue 最核心的两个功能:数据驱动和组件化。
组件化开发给我们带来了:
- 更快的开发效率
- 更好的可维护性
每个组件都有自己的状态、视图和行为等组成部分。
```js
new Vue({
// state
data() {
return {
count: 0
}
},
// view
template: `{{ count }}
`,
// actions
methods: {
increment() {
this.count++
}
}
})
```
**状态管理包含以下几个部分**
- state,驱动应用的数据源
- view, 以声明方式将state映射到视图
- actions,响应在view上的用户输入导致的状态变化
- 见图
### 2.组件通信方式- 父组件给自组件传值
大多数场景下的组件都并不是独立存在的,而是相互协作共同构成了一个复杂的业务功能。在 Vue 中为
不同的组件关系提供了不同的通信规则。
- 见图
**父组件给自组件传值**
- 子组件中通过props接收数据
- 父组件中给自组件通过相应属性传值
```js
// parent
Props Down Parent
```
```js
// child
Props Down Child
{{ title }}
```
### 3.自组件给父组件传值
```html
// child
Props Down Child
```
```html
// parent
Event Up Parent
这里的文字不需要变化
```
通过自组件触发事件携带参数,然后在父组件注册子组件内部触发的事件,并接收参数,通过`$emit`
### 4.不相关组件传值
```
// eventbus
import Vue from 'vue'
export default new Vue()
```
```html
```
```html
Event Bus Sibling02
{{ msg }}
```
### 5.通过ref获取子组件
其他常见方式
- $root
- $parent
- $children
- $refs
ref 有两个作用:
- 如果你把它作用到普通 HTML 标签上,则获取到的是 DOM 如果你把它作用- 到组件标签上,则获取到的是组件实例
创建 base-input 组件
```html
```
在使用子组件的时候,添加 ref 属性:
```html
```
然后在父组件等渲染完毕后使用 $refs 访问:
```js
mounted () { this.$refs.usernameInput.focus()
}
```
> `$refs` 只会在组件渲染完成之后生效,并且它们不是响应式的。这仅作为一个用于直接操作子组 件的“逃生舱”——你应该避免在模板或计算属性中访问 `$refs` 。
### 6.简易的状态管理方案
问题
- 多个视图依赖同一状态
- 来自不同视图的行为需要变更同一状态
使用父子组件,麻烦不易管理
### 7.什么是Vuex
> Vuex 是一个专为 Vue.js 应用程序开发的状态管理模式。它采用集中式存储管理应用的所有组件 的状态,并以相应的规则保证状态以一种可预测的方式发生变化。Vuex 也集成到 Vue 的官方调 试工具 devtools extension,提供了诸如零配置的 time-travel 调试、状态快照导入导出等高级调 试功能。
- Vuex 是专门为 Vue.js 设计的状态管理库
- 它采用集中式的方式存储需要共享的数据
- 从使用角度,它就是一个 JavaScript 库
- 它的作用是进行状态管理,解决复杂组件通信,数据共享
**什么情况下使用 Vuex**
- 非必要的情况不要使用Vuex
- 大型的单页应用程序
- 多个视图依赖与同一状态
- 来自不同视图的行为需要变更同一状态
**Vuex核心概念**
- Store
- State
- Getter
- Mutation
- Action
- Module
### 8. Vuex基本结构
- 导入 Vuex
- 注册 Vuex
- 注入 $store 到 Vue 实例
```js
import Vue from 'vue';
import Vuex from 'vuex';
Vue.use(Vuex)
export default new Vuex.Store({
state: {
},
mutations: {
},
actions: {
},
modules: {
}
})
import store from './store'
new Vue({
router,
store,
render: h => h(App)
}).$mount('#app')
```
### 9.State
- state 是响应式的
- Vuex 使用单一状态树,用一个对象就包含了全部的应用层级状态。 使用 mapState 简化 State 在视图中的使用,mapState 返回计算属性 mapState 有两种使用的方式:
接收数组参数
```js
// 该方法是vuex 提供的, 所以使用前需要导入
import { mapState } from 'vuex'
// 通过传入对象, 可以重命名返回的计算属性
// 在模版中直接使用num 和 messge
export default {
computed: {
...mapState({ num: 'count', message: 'msg' })
}
}
```
### 10.Getter
Getter 就是 store 中的计算属性,使用 mapGetter 简化视图中的使用
```js
import { mapGetter } from 'vuex'
computed: {
...mapGetter(['reverseMsg]),
...mapGetters({ reverse: 'reverseMsg'})
}
```
### 11.Mutation
更改 Vuex 的 store 中的状态的唯一方法是提交 mutation。Vuex 中的 mutation 非常类似于事件:每 个 mutation 都有一个字符串的 事件类型 (type) 和 一个 回调函数 (handler)。这个回调函数就是我们 实际进行状态更改的地方,并且它会接受 state 作为第一个参数。
使用 Mutation 改变状态的好处是,集中的一个位置对状态修改,不管在什么地方修改,都可以追踪到 状态的修改。可以实现高级的 time-travel 调试功能
```js
import { mapMutations } from 'vuex'
methods: {
...mapMutations(['increate']),
...mapMutations({
increateMut: 'increeate'
})
}
```
### 12. Action
Action类似与mutation,不同在于
- Action提交的是mutation,而不是直接变更状态
- Action 可以包含任意异步操作
```js
import { mapActions } from 'vuex'
export default new Vuex.Store({
state: {
count: 0,
msg: 'Hello Vuex'
},
actions: {
increateAsync (context, payload) {
context.commit('increate', payload)
}
}
})
methods: {
..mapActions(['increate']),
// 传对象解决重名的问题
...mapActions({
increateAction: 'increate'
})
}
```
### 13.module
由于使用单一状态树,应用的所有状态会集中到一个比较大的对象。当应用变得非常复杂时,store 对 象就有可能变得相当臃肿。
为了解决以上问题,Vuex 允许我们将 store 分割成模块(module)。每个模块拥有自己的 state、 mutation、action、getter、甚至是嵌套子模块。
在案例中体会 Module 的使用。
```js
// products.
const state = {
products: [
{ id: 1, title: 'iPhone 11', price: 8000 },
{ id: 2, title: 'iPhone 12', price: 10000 }
]
}
const getters = {}
const mutations = {
setProducts (state, payload) {
state.products = payload
}
}
const actions = {}
export default {
namespaced: true,
state,
getters,
mutations,
actions
}
// index.js
import products from './modules/products'
import cart from './modules/cart'
// index.js
export default new Vuex.Store({
state: {
count: 0,
msg: 'Hello Vuex'
},
modules: {
products,
cart
}
})
// app.vue
export default {
computed: {
...mapState('products', ['products'])
},
methods: {
...mapMutations('products', ['setProducts'])
}
}
```
### 14.Vuex严格模式
Vuex中的状态的更新要通过提交mutation来修改,但其实在组件中还可以通过$store.state.msg进行修改,从语法从面来说这是没有问题的,但是这破坏了Vuex的约定,如果在组件中直接修改state,devtools无法跟踪到这次状态的修改。
开启严格模式之后,如果在组件中直接修改state会抛出错误,但数据仍被成功修改。
如何开启:在store中增加一个属性strict为true
```js
export default new Vuex.Store({
strict: process.env.NODE_ENV !== 'production',
state: {
count: 0,
msg: 'Hello Vuex'
},
// ...
})
```
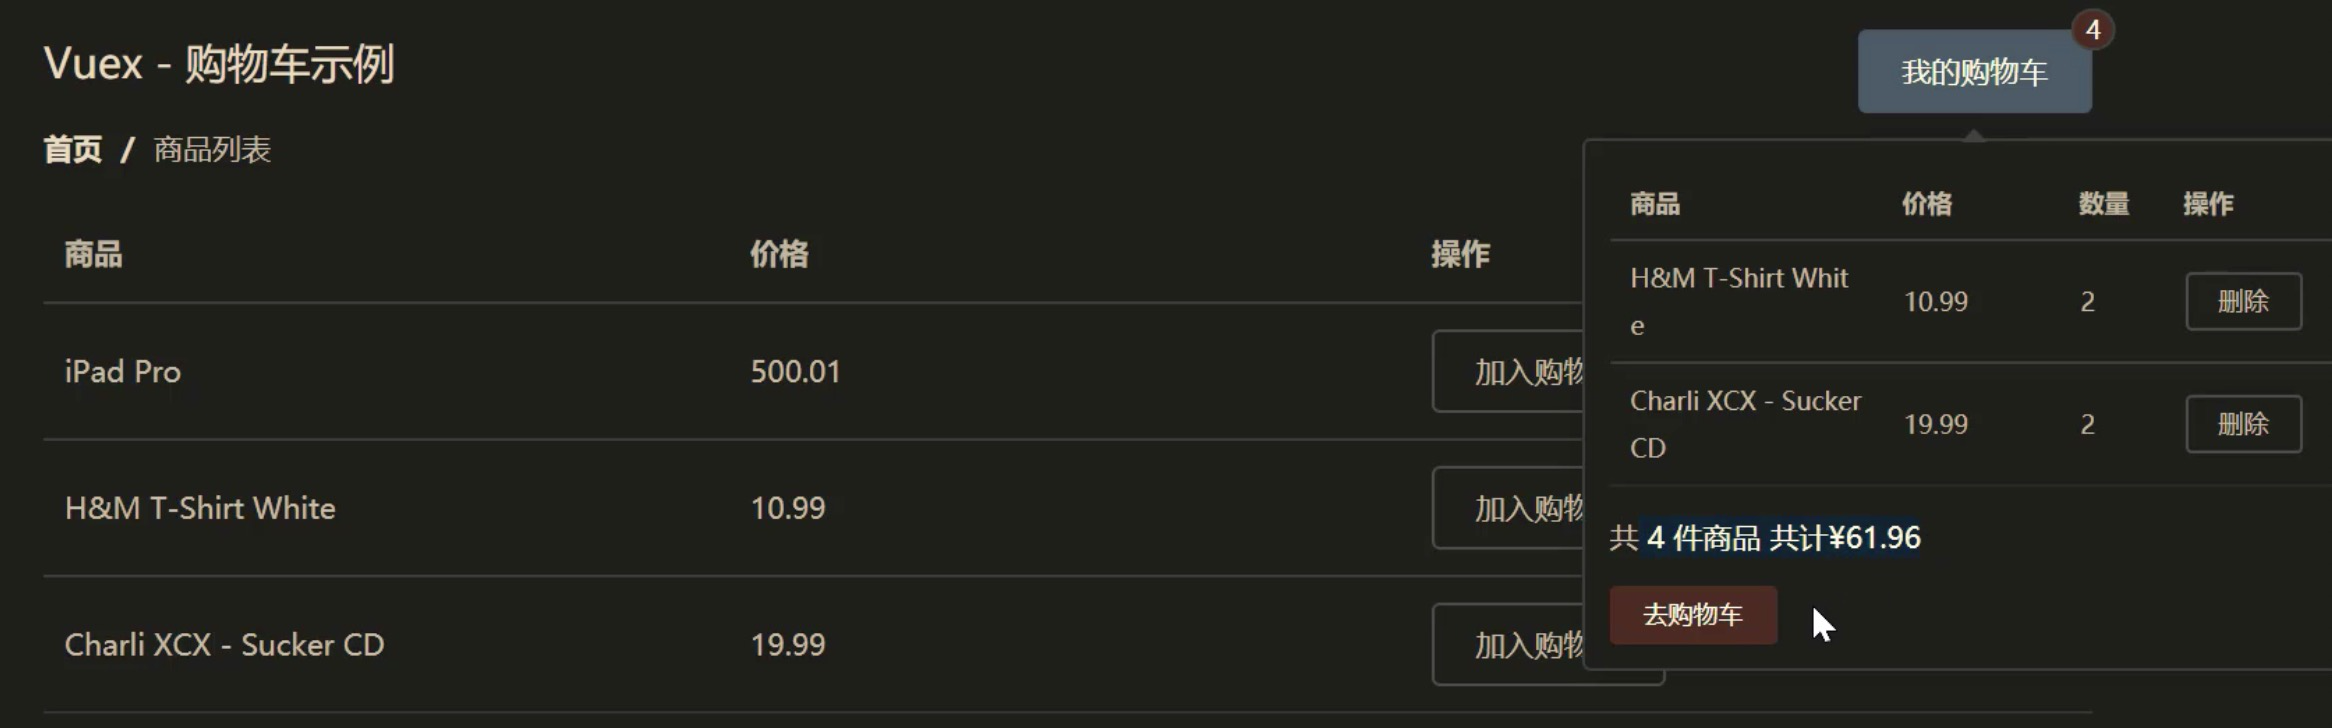
### 15 购物车案例-演示
### 16. 购物车案例
```js
npm i element-ui -S
// main.js
import 'element-ui/lib/theme-chalk/index.css';
Vue.config.productionTip = false
Vue.use(ElementUI)
```