# HiAuth
**Repository Path**: bestaone/HiAuth
## Basic Information
- **Project Name**: HiAuth
- **Description**: 基于OAuth2.0协议的认证授权系统
- **Primary Language**: Unknown
- **License**: MIT
- **Default Branch**: master
- **Homepage**: None
- **GVP Project**: No
## Statistics
- **Stars**: 4
- **Forks**: 1
- **Created**: 2021-03-02
- **Last Updated**: 2026-07-04
## Categories & Tags
**Categories**: Uncategorized
**Tags**: None
## README
Hi Auth
HiAuth是一个开源的基于OAuth2.0协议的认证、授权系统,除了标准的OAuth2.0授权流程功能外,还提供了应用管理、用户管理、权限管理等相关功能。
[](https://github.com/bestaone/HiAuth/stargazers)
[](https://github.com/bestaone/HiAuth/network/members)
[](https://github.com/bestaone/HiAuth)
[](https://github.com/bestaone/HiAuth/blob/master/LICENSE)
[](https://github.com/bestaone)
## 介绍
除了认证相关功能外,还提供了`/example/demo`、`/example/himall`项目,供用户参考如何集成。
- 参考`demo`实例,你可以几分钟之内快速验证如何集成HiAuth;
- 参考`himall`实例,你可以快速的启动一个带页面的实例;
### LIVE
- HiAuth Docs:http://docs.hiauth.cn
- HiAuth Admin:http://auth.hiauth.cn/admin
- HiAuth 授权页:http://auth.hiauth.cn
### 目录结构
```
├─cicd 持续集成
├─docs 开发文档
├─example 样例
│ ├─demo 基础样例
│ ├─hiauth-client 使用hiauth-client-spring-boot-starter集成hiauth的样例
│ ├─hiauth-client-exp hiauth-client的简易版,用于做实验
│ ├─hiauth-server-exp hiauth-server的简易版,用于做实验
│ ├─himall 带有页面的样例
│ ├─resource 资源服务样例
│ ├─spring-cloud spring-cloud微服务集成样例,原生集成
│ ├─spring-cloud-with-hiauth-client spring-cloud微服务集成样例,使用starter集成
│ ├─wechat-login 微信登录样例
├─hiauth-client-starter hiauth-client SDK
│ ├─hiauth-client-commons 基础包
│ ├─hiauth-client-spring-boot-starter 适用于SpringBoot直接集成
│ ├─hiauth-client-session-spring-boot-starter SpringCloud架构中,业务服务中的session管理SDK
│ ├─hiauth-client-spring-cloud-gateway-starter SpringCloudGateway中集成认证授权
├─hiauth-front 管理端前端项目
├─hiauth-server HiAuth服务端
├─other 其他内容,数据库脚本等
```
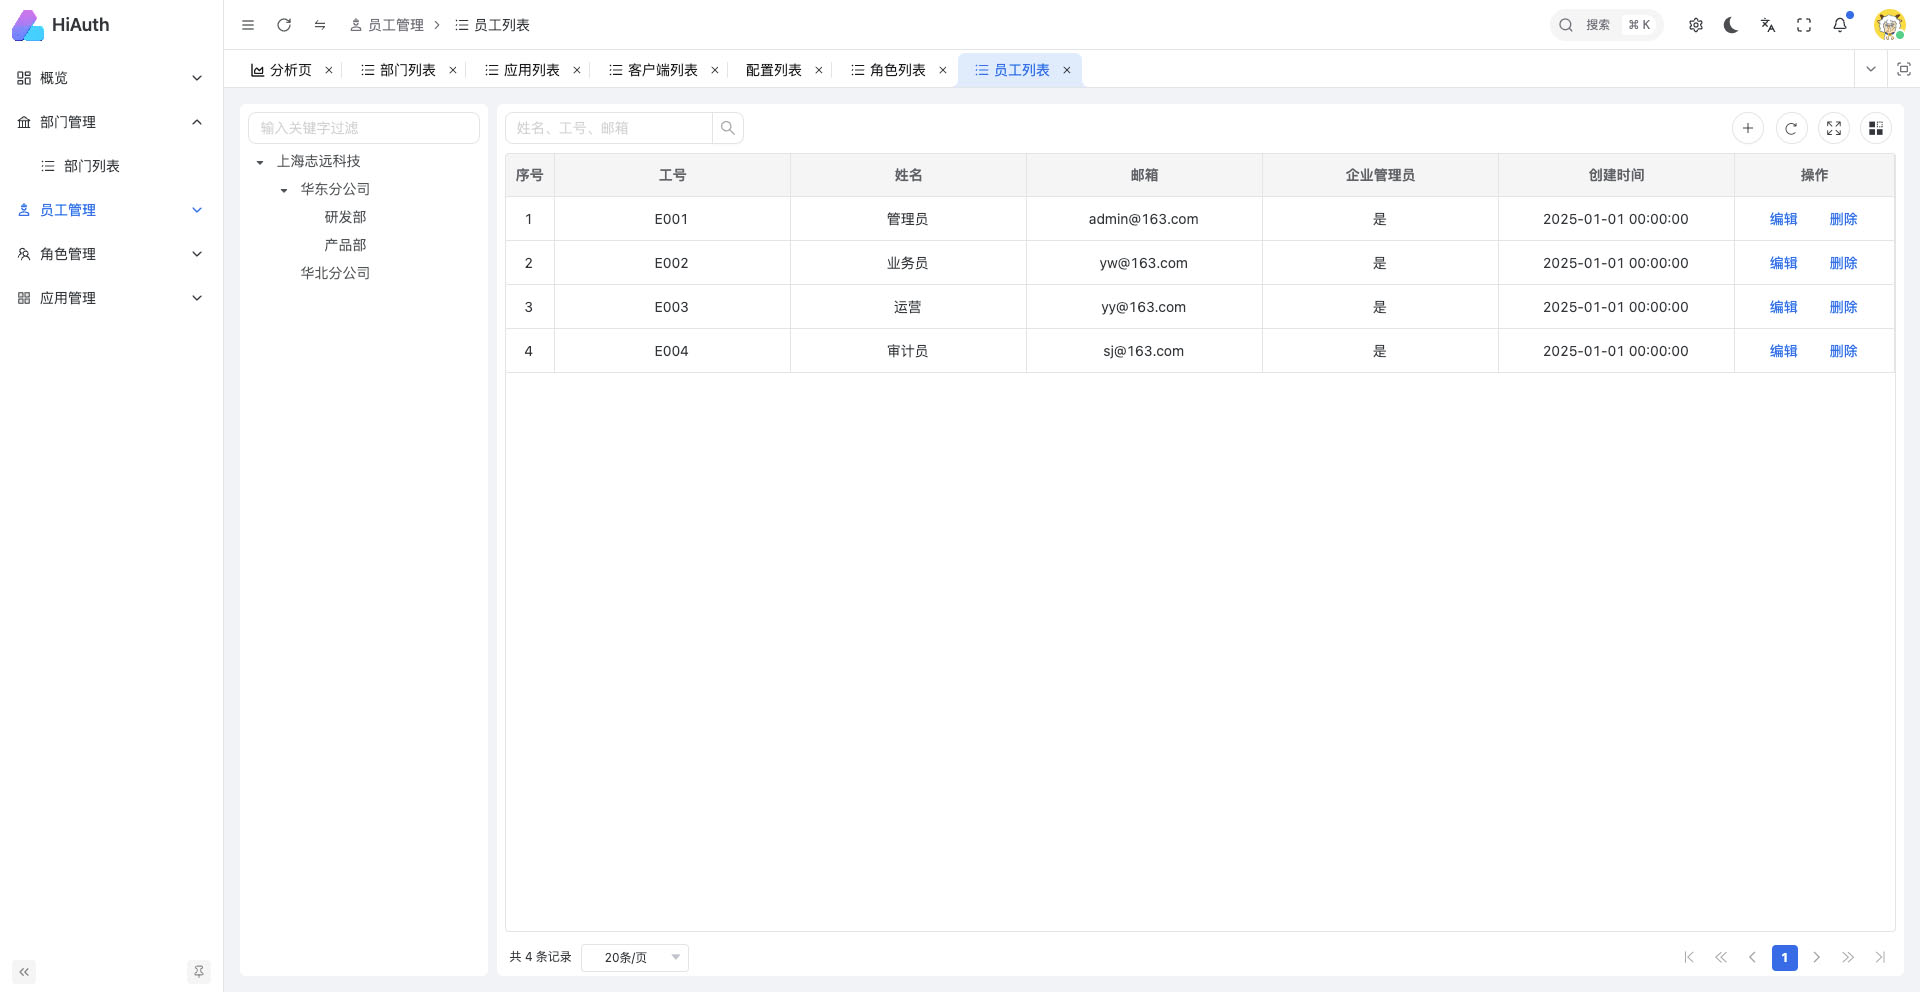
## 效果图
- 认证中心登录页

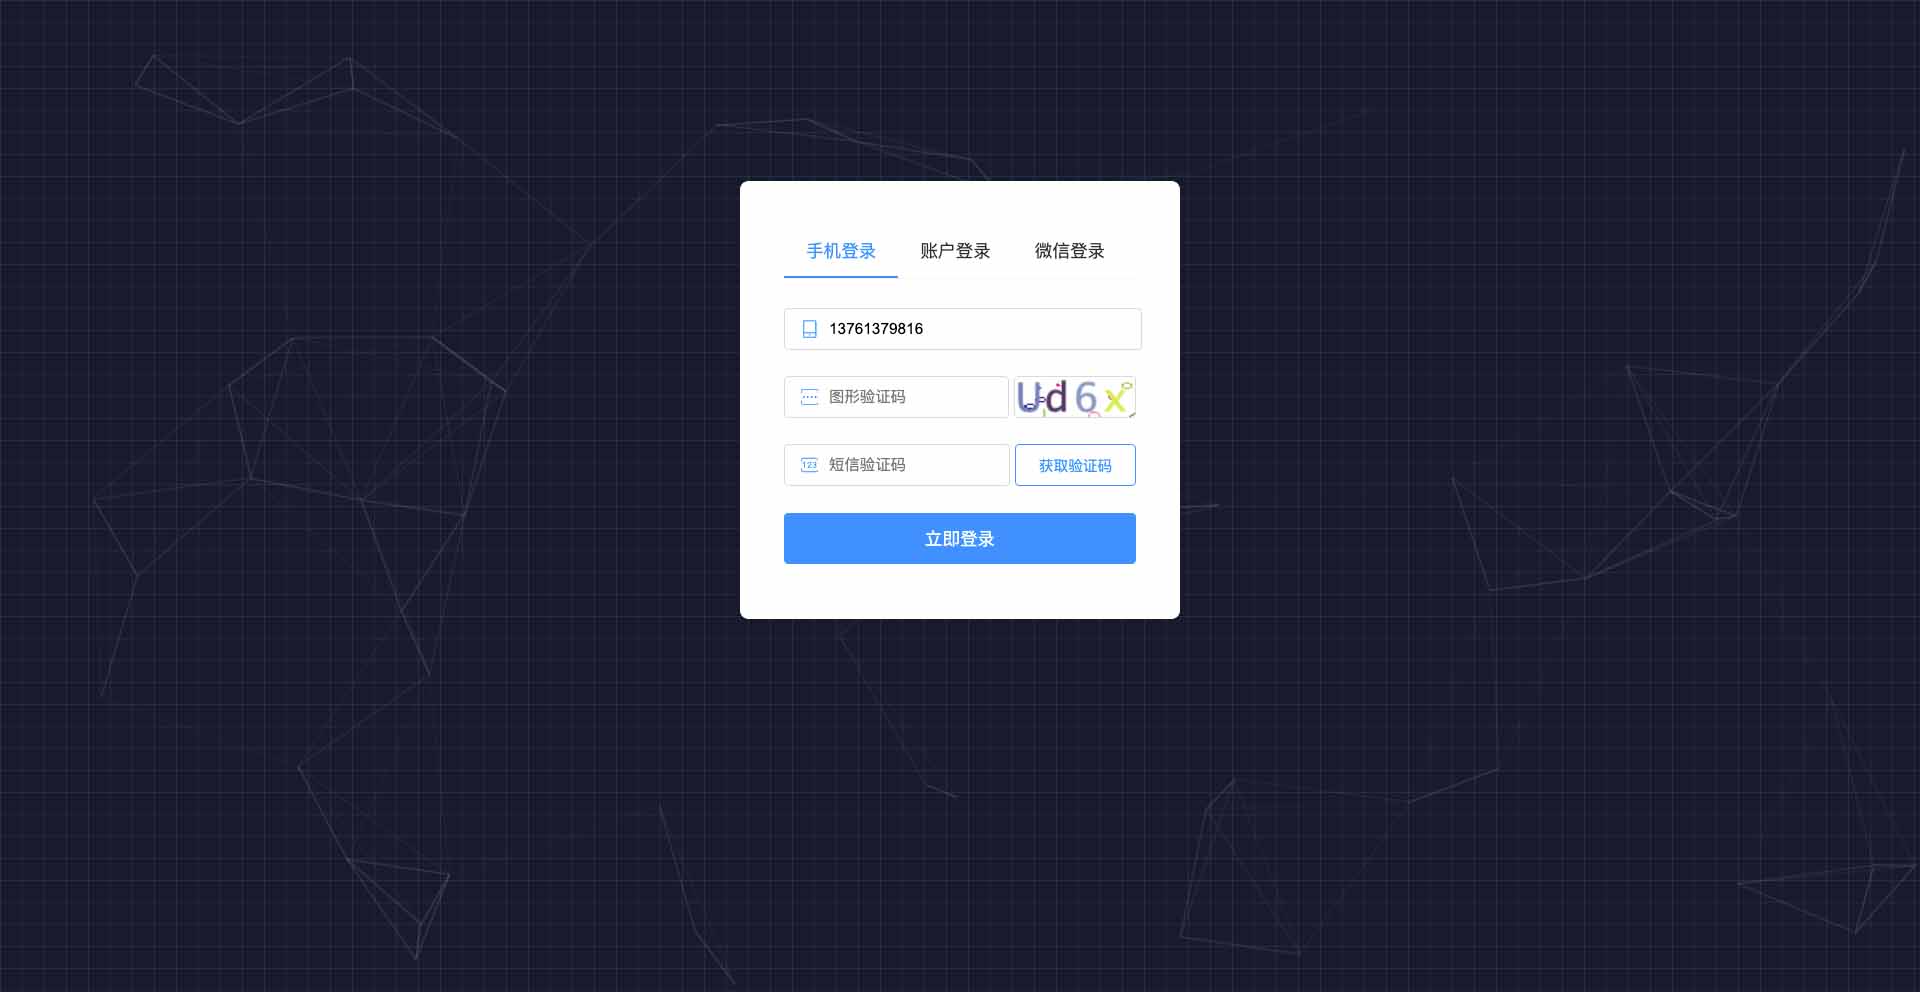
- 管理后台登录页
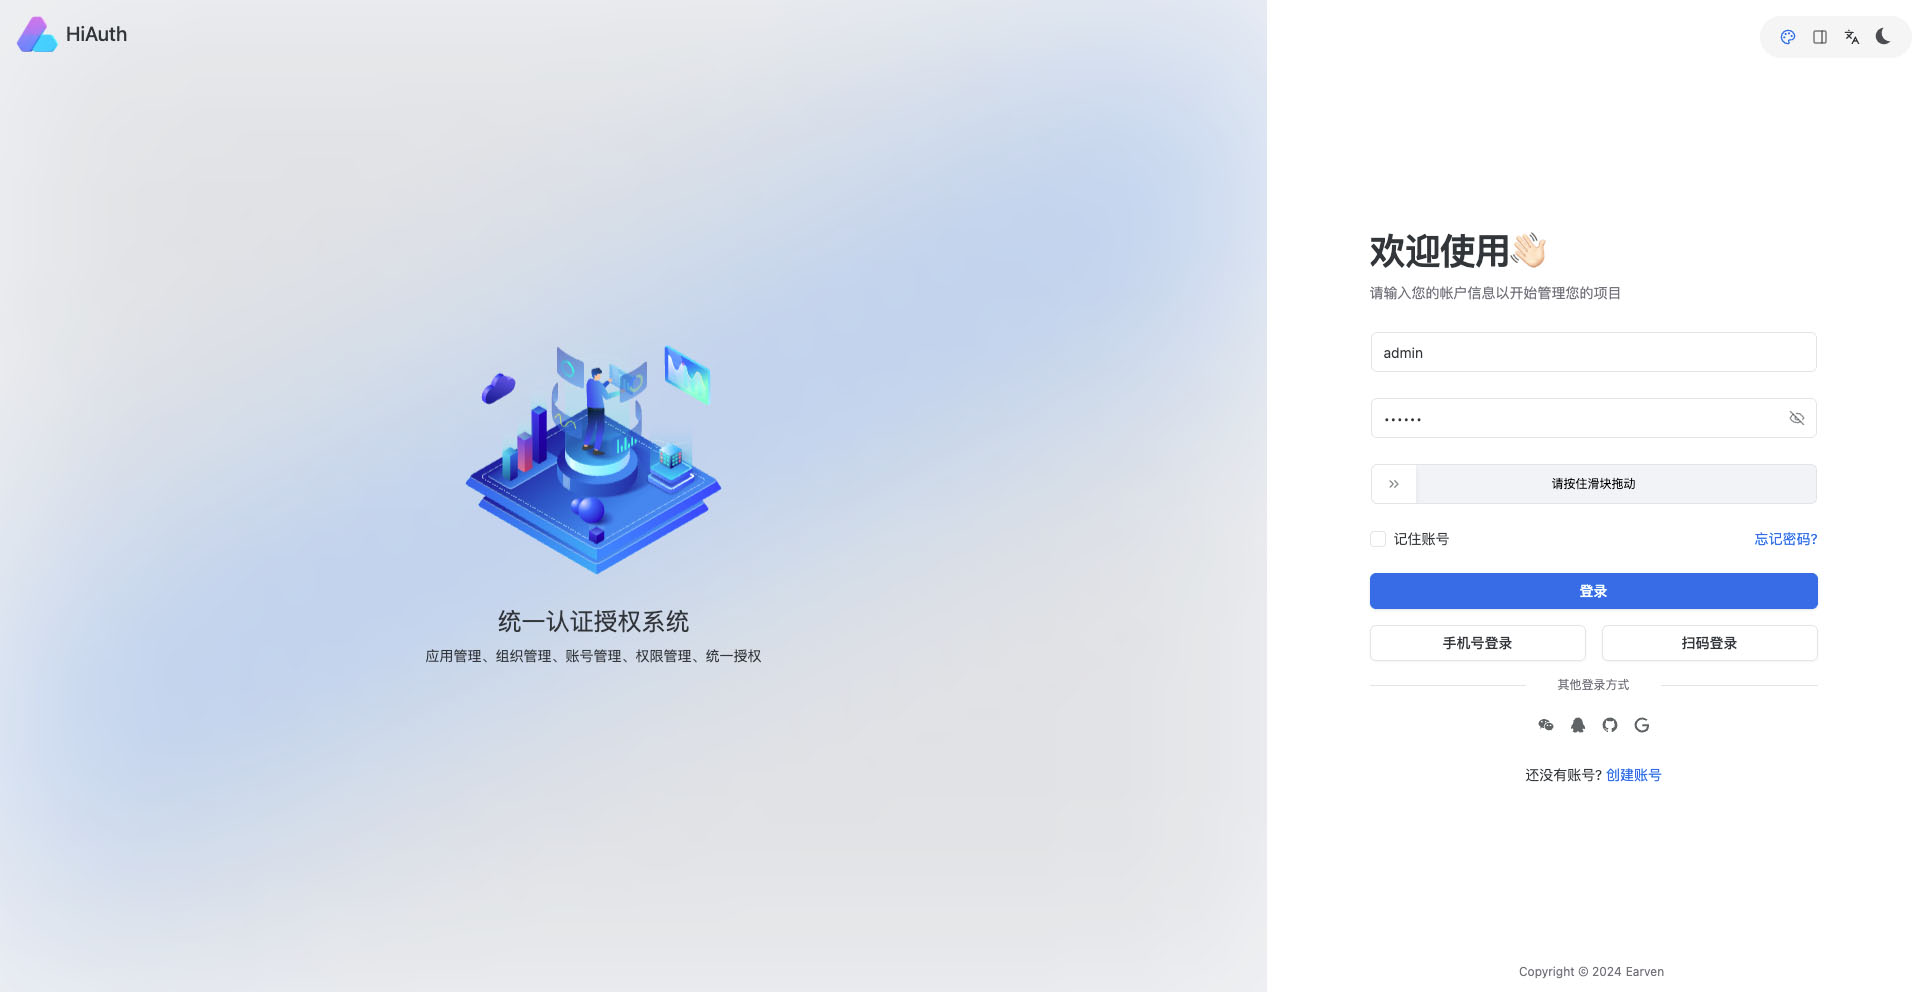
- 超级管理员-用户管理页
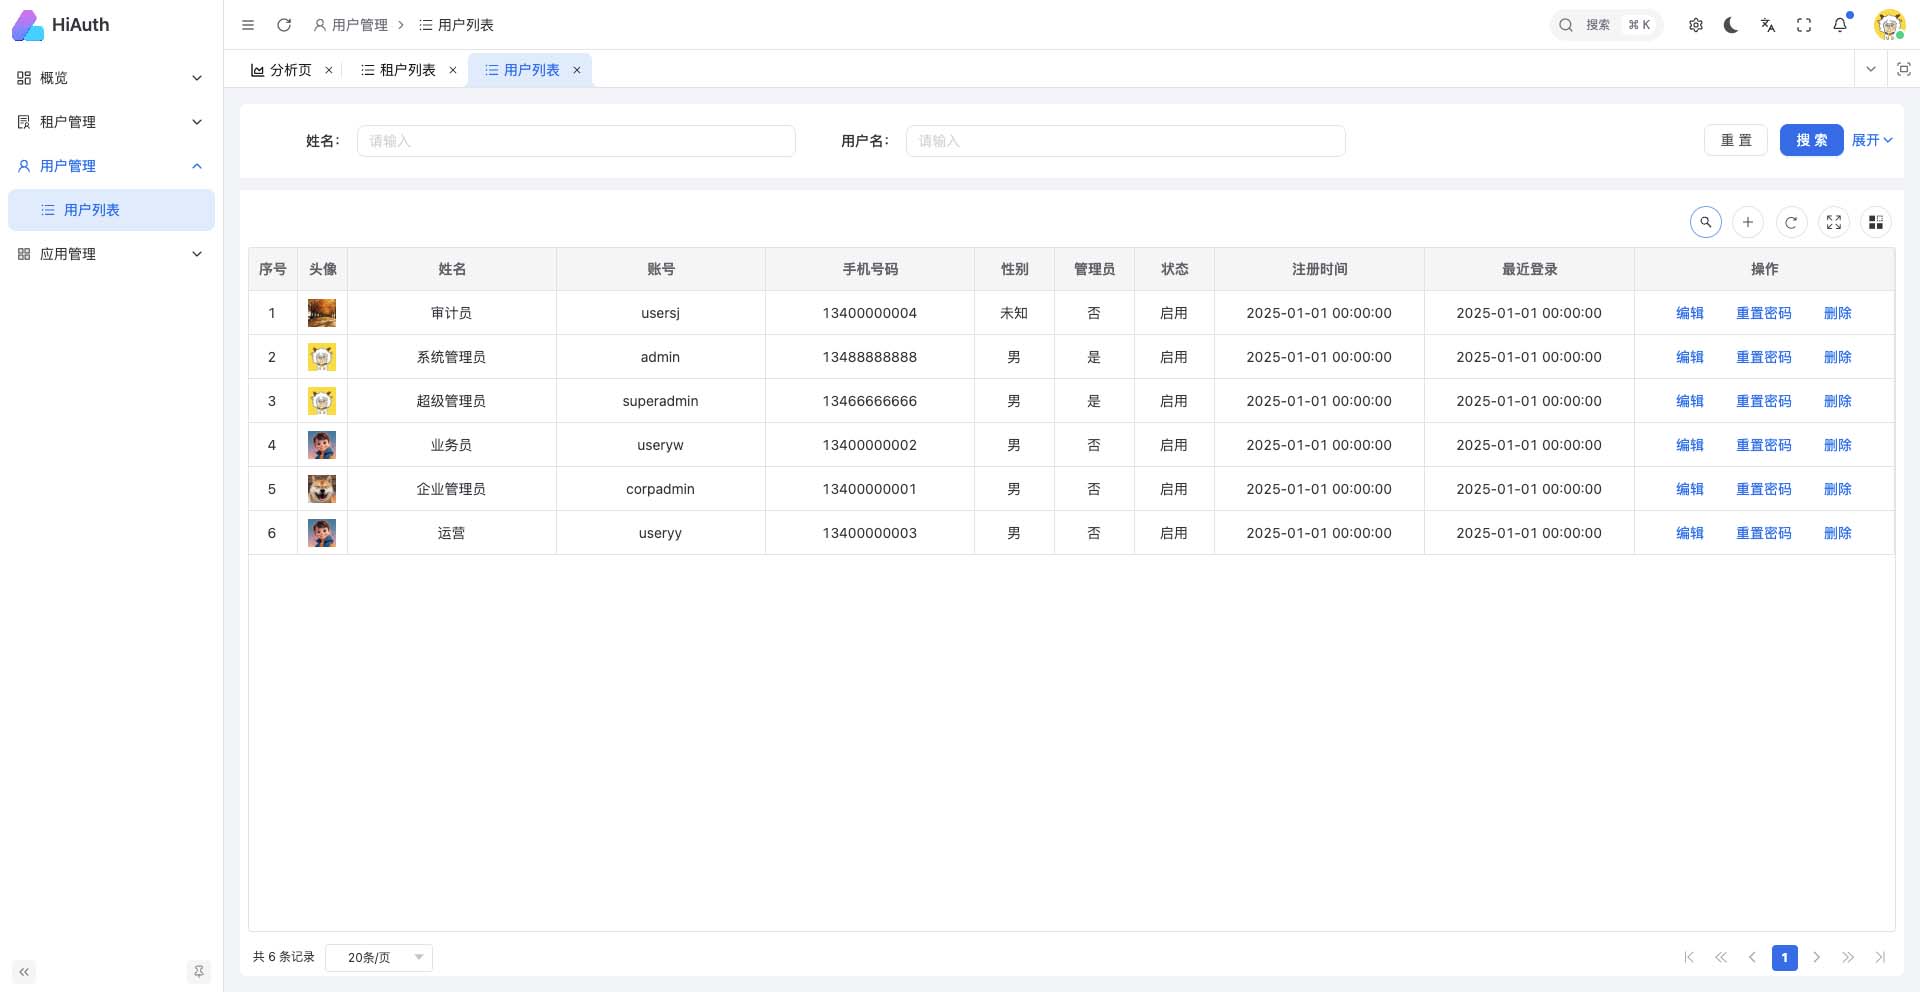
- 企业管理员-部门列表页
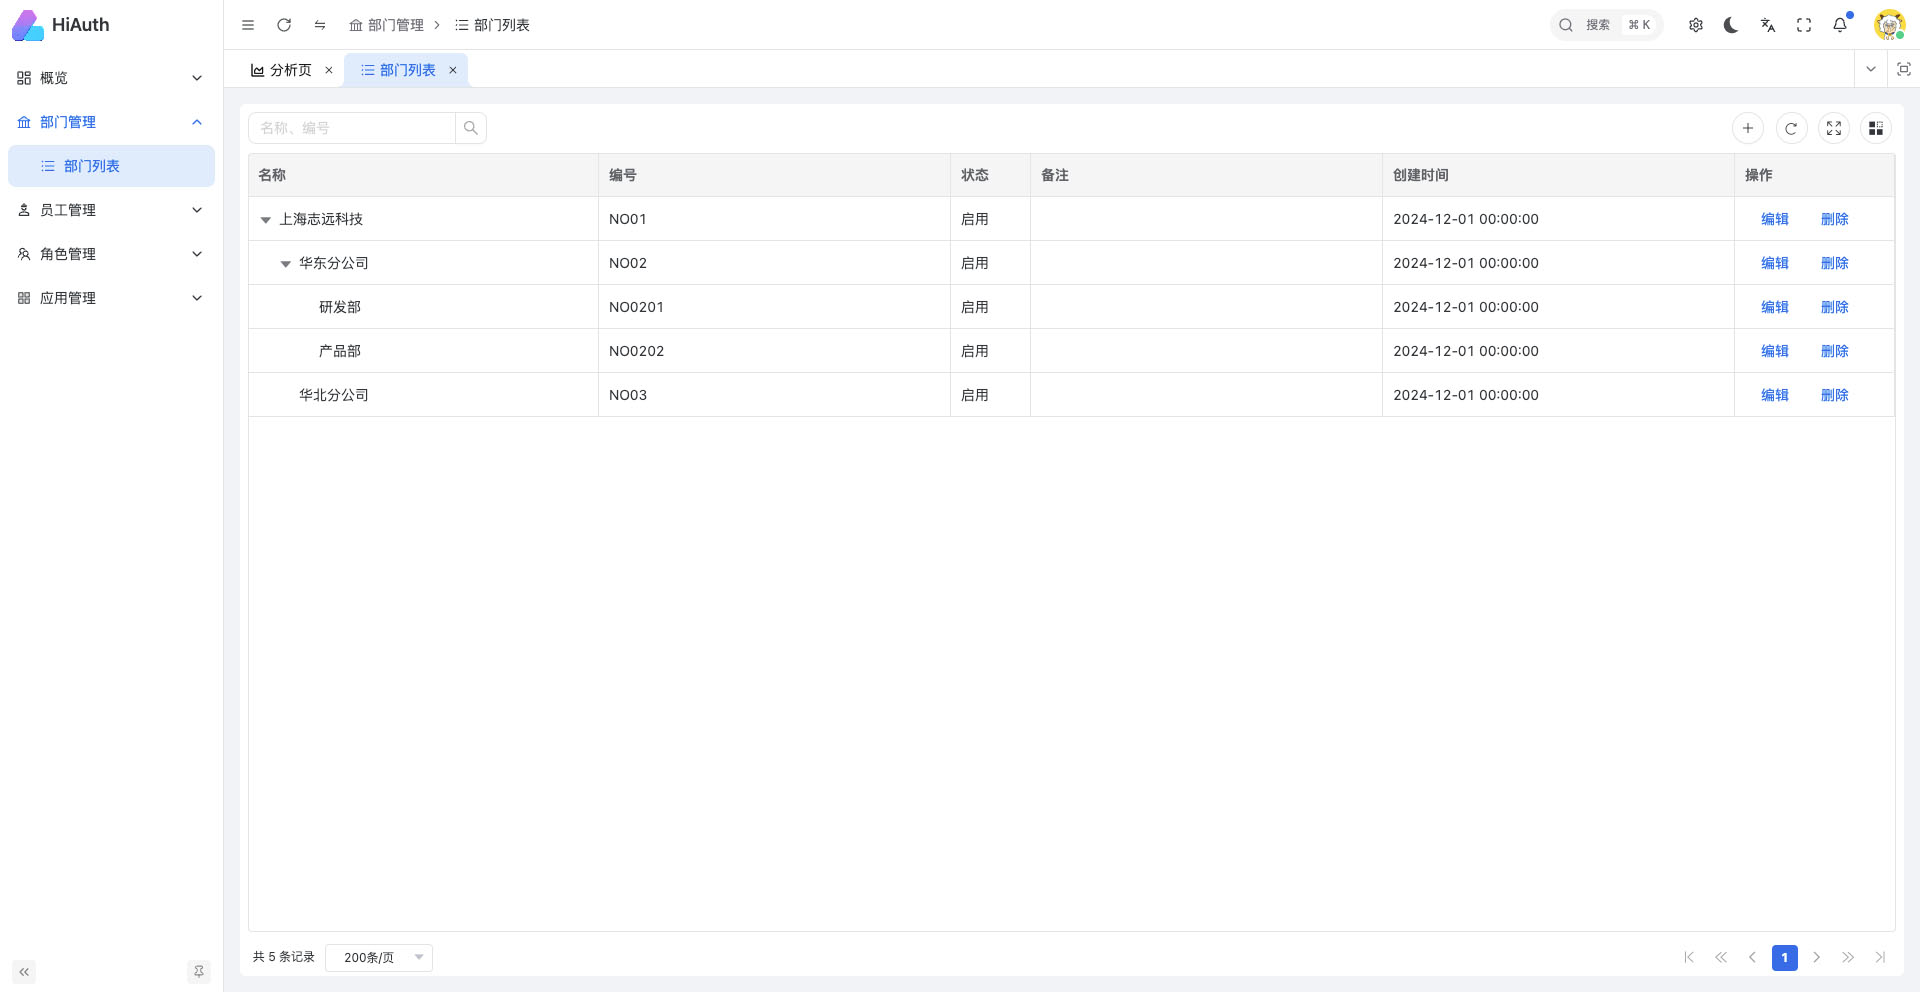
- 企业管理员-员工列表页
**如果你觉得此项目对你有帮助,请给我点个star,谢谢!**
## 快速尝试
### 环境要求
- Git
- JDK17+
- Maven 3.8+
### 下载源码
```sh
$ git clone https://github.com/bestaone/HiAuth.git
```
### 构建、启动
```sh
# 启动himall实例
$ cd HiAuth/example/himall
$ mvn clean install
$ mvn spring-boot:run
```
### 验证
- 访问HiMall:http://127.0.0.1:9000 点击`Login`按钮,登录账号:`corpadmin/123456`
> 注意:`127.0.0.1`不能使用`localhost`代替,因为数据库中配置了回调地址为`http://127.0.0.1:9000`。
## 认证模式
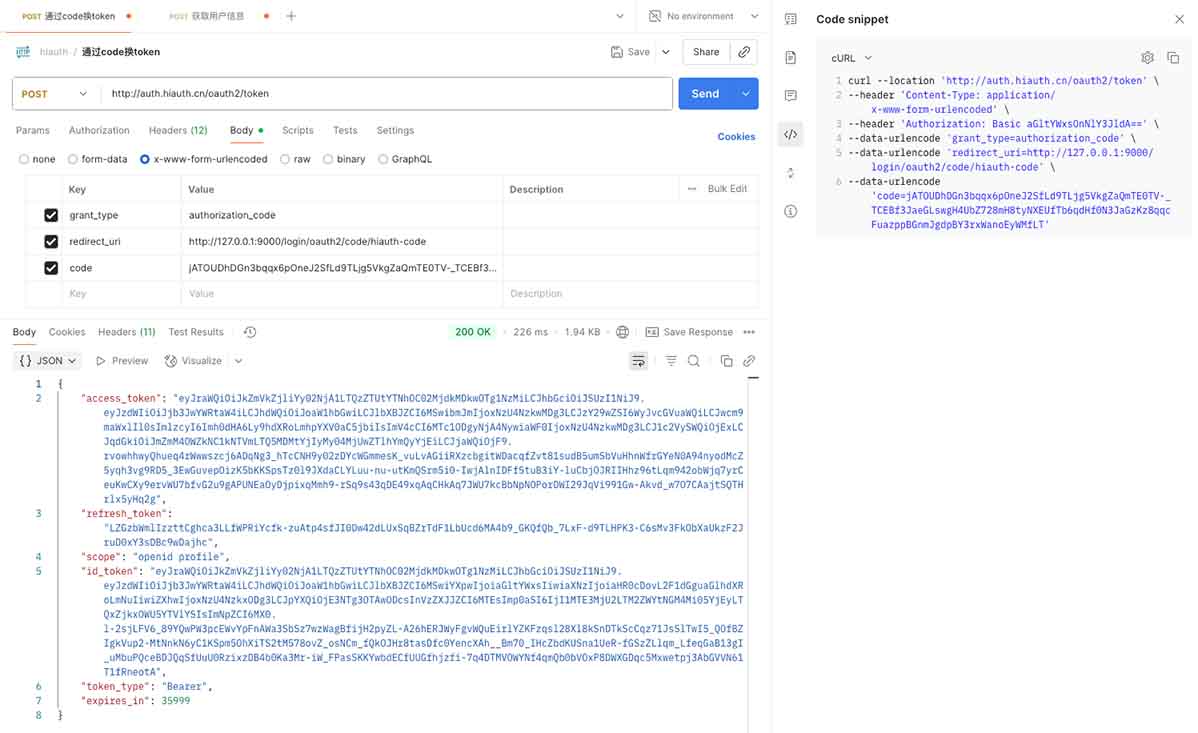
**authorization_code模式:**
- 访问授权端点获取`授权码`: http://auth.hiauth.cn/oauth2/authorize?response_type=code&client_id=himall&scope=openid%20profile&redirect_uri=http://127.0.0.1:9000/login/oauth2/code/hiauth-code
- 用户登录并授权后,重定向到`redirect_uri`并附带`授权码`,如下(注意:浏览器开发模式下,网络控制台中,url的参数code值):
```shell
http://127.0.0.1:9000/login/oauth2/code/hiauth-code?code=R4vhO65LvdsNqQ9A3KHwjb...
```
- 使用`授权码`换取访问`令牌`
```shell
# 最后的YourCode替换为上面步骤获取的授权码
$ curl --location --request POST 'http://auth.hiauth.cn/oauth2/token' \
--header 'Content-Type: application/x-www-form-urlencoded' \
--header 'Authorization: Basic aGltYWxsOnNlY3JldA==' \
--data-urlencode 'grant_type=authorization_code' \
--data-urlencode 'redirect_uri=http://127.0.0.1:9000/login/oauth2/code/hiauth-code' \
--data-urlencode 'code=YourCode'
# 或者
$ curl --location --request POST 'http://auth.hiauth.cn/oauth2/token' \
--header 'Content-Type: application/x-www-form-urlencoded;charset=UTF-8' \
--header 'Authorization: Basic aGltYWxsOnNlY3JldA==' \
--data 'grant_type=authorization_code&redirect_uri=http://127.0.0.1:9000/login/oauth2/code/hiauth-code&client_id=himall&client_secret=secret&code=YourCode'
```
> 上述“Authorization: Basic aGltYWxsOnNlY3JldA==”中的值“aGltYWxsOnNlY3JldA==”,
> 计算方式为:Base64.encode(client_id:client_secret),
> 例如:client_id=himall,client_secret=secret时,base64解码为:Base64.encode("himall:secret")
返回结果:
```json
{
"access_token": "eyJraWQiOiJkZTYxMjVmNi0wYTQ5LTQwMGYtYWMzMC02M2U2Zm",
"refresh_token": "8WS6liiSW0gmUy8yudFAPIHGor3Hf6yBtaBTUNjj3-q9y4JXRlBZ",
"scope": "openid profile",
"token_type": "Bearer",
"expires_in": 35999
}
```
**client_credentials模式:**
```shell
$ curl --location --request POST 'http://auth.hiauth.cn/oauth2/token' \
--header 'Content-Type: application/x-www-form-urlencoded' \
--data-urlencode 'grant_type=client_credentials' \
--data-urlencode 'client_id=himall' \
--data-urlencode 'client_secret=secret' \
--data-urlencode 'scope=profile'
# 或者
$ curl --location --request POST 'http://auth.hiauth.cn/oauth2/token' \
--header 'Content-Type: application/x-www-form-urlencoded' \
--data 'grant_type=client_credentials&client_id=himall&client_secret=secret&scope=profile'
```
返回结果:
```json
{
"access_token": "eyJraWQiOiJkZTYxMjVmNi0wYTQ5LTQwMGYtYWMzMC02M2U2Zm",
"scope": "profile user",
"token_type": "Bearer",
"expires_in": 35999
}
```
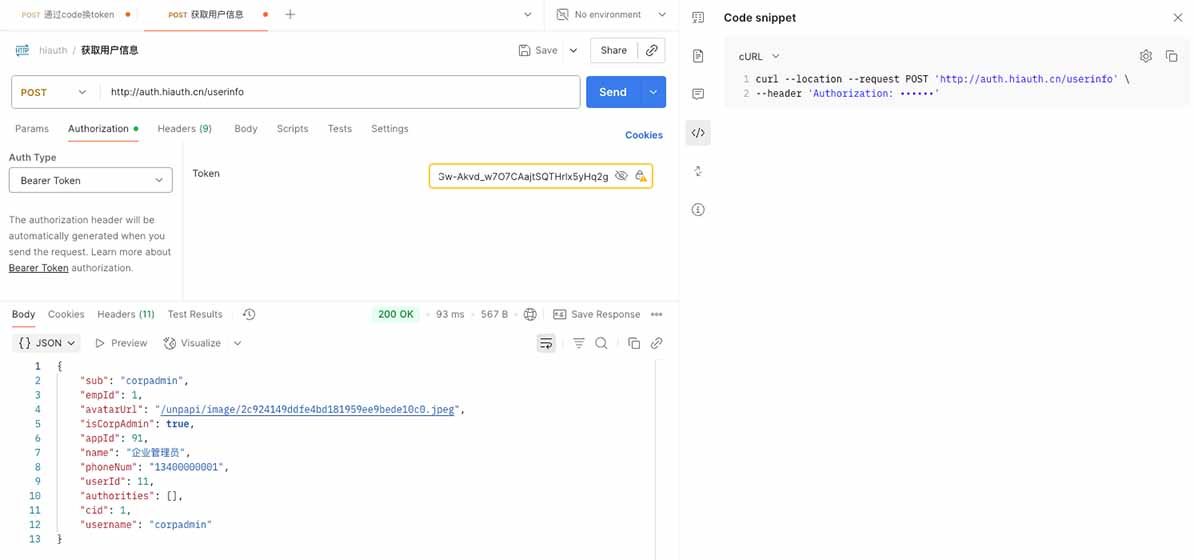
**用户信息获取:**
```shell
# 将accessToken替换为上面步骤获取的访问令牌
$ curl --location --request POST 'http://auth.hiauth.cn/userinfo' \
--header 'Accept: application/json' \
--header 'Authorization: Bearer accessToken'
```
> 注意:只在code码模式`grant_type=authorization_code`下生效。
返回结果:
```shell
{
"sub": "corpadmin",
"empId": 1,
"avatarUrl": "/unpapi/image/2c924149ddfe4bd181959ee9bede10c0.jpeg",
"appId": 91,
"name": "企业管理员",
"phoneNum": "13400000001",
"userId": 11,
"authorities": [],
"cid": 1,
"username": "corpadmin"
}
```
**scop权限:**
- 在授权请求中包含所需scope
- 获取的访问令牌将包含授予的scope
- 资源服务器验证请求的scope是否匹配
```java
@PreAuthorize("hasAuthority('SCOPE_profile')")
@GetMapping("/protected")
public String protectedResource() {
return "Accessed protected resource";
}
```
### 其他
- 获取认证服务器配置信息:http://auth.hiauth.cn/.well-known/openid-configuration
### 更多集成方式
- 云端SaaS版集成,[参考文档](http://docs.hiauth.cn/guide/saas);
- 本地Docker版集成,[参考文档](http://docs.hiauth.cn/guide/docker);
- 源码编译安装集成,[参考文档](http://docs.hiauth.cn/guide/sourcecode);
## 社区与作者

>如果群二维码失效了,请先添加我的微信,然我我拉你入群。
## 授权协议
本项目执行 [MIT](https://github.com/bestaone/HiAuth/blob/master/LICENSE) 协议